Here’s How To Install The Steadyrack Bike Rack And My Initial Thoughts On The Rack System
Here's How To Install The Steadyrack Bike Rack And My Initial Thoughts On The Rack System.
Is there anything worse than bad bike storage? For years we struggled with storing our bikes in our various garages. I’ve tried a bunch of bike racks – hooks, braces, flip-hooks, you name it… They all were miserable to use.
After some online research we ordered a 4 pack of the Steadyrack bike racks. We ordered them on Amazon and literally had them in 3 days. An hour ago I unboxed them and put them up in our garage. Wow! I’m impressed!
The Steadyrack system is totally awesome! It’s easy to install and super easy to use. It’s also a very efficient and compact method of bike storage.
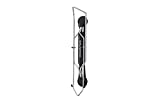
I’m also impressed with the build of the Steadyrack. The rack is made from thick, zinc-coated steel and operates very smoothly and feel solid when mounting a bike and swiveling for storage.
Steadyrack bike rack install and first impressions.
For my project I ordered a four pack of the Steadyrack classic model. The classic model fits road bikes, commuters, hybrids and kids bikes – any bike with a wheel widths up to 2.4″. For wider-wheeled bikes, Steadyrack makes the mountain bike model for wheel widths of 2.1 to 2.8″, and the Fat tire model for wheel widths of 3 – 5″. They also make a Fender bike model made for bikes with front wheel fenders.
Ready on for an overview of my Steadyrack project.
Overview | Steadyrack Bike Rack Install
Project Goal: Install and use the Steadyrack bike rack system.
Gather a cordless drill, bit and drill sets, a socket set (13mm or 1/2" if using supplied lag bolts), a level, and a pencil. Open the Steadyrack box, remove the components and ready the install instructions.
The install instructions do not mention a few things that we were interested in, specifically:
- What is the proper spacing between multiple units?
- With a group of racks, do you mount them at the same height or vary the mounting position based on the bike?
With our group of 4 racks in our garage, with the space we had to use, we found that mounting the racks about the width of the handle bars or just under their width worked well. Ours are spaced 20" apart.
Narrower spacing will make it more difficult to mount a bike with others in the adjacent racks, but with the ability to swivel adjacent racked bikes to the side, you will still should be able to mount bikes in the racks, even if spaced narrower than handle bar width.
Regarding mounting height, we chose to mount all of our group of 4 racks at the same height - the height for the longest bike. With the racks all mounted at the same height, the racks are interchangeable - you can use any rack for any of your bikes. It also looks neat to mount them all at the same height.
The downside of similar-height mounts is that the handle bars tend to interfere with each other when mounting a bike, although this doesn't seem to be a big issue as you can swivel adjacent bikes away or angle the bike you are mounting slightly when loading it into the rack.
Measure bike(s) and prepare for rack install
Following the directions from Steadyrack, hold your bike against the wall with the front tire mounted in the Steadyrack holder. Measure the distance from the wall to the mounting holes at the top of the rack. To this measurement add 2 - 3" to allow the rack to hold the bike slightly off the floor when mounted in the rack.
If mounting multiple racks, repeat this for each bike if mounting each bike rack at a height specific for a certain bike. If mounting all the racks at the same height, mount the racks at the highest measurement for all the bikes (just measure the longest bike mount position and use this for all the racks).
If mounting all the racks at the same, longest bike, height, the shorter bikes will obviously have more floor clearance once mounted.
Mount Steadyrack to wall
Mount the Steadyrack unit to the wall using the supplied stainless steel lag bolts or suitable alternative.
If you are mounting the Steadyrack frame onto a timber stud drywall-covered wall, first located the studs (using a stud finder or other method) and mount the Steadyrack unit directly over the studs, securing with either the supplied lag bolts or similar, self-taping construction lag screws (I used self-tapping lag screws). To use the supplied lag bolts, first drill a 1/4" pilot hole and install the lag bolts. Use care not to over-tighten the lag bolts as they can split the underlying stud framing members in the wall. For a stud wall install, use the top and bottom vertically-aligned mounting holes at the top and bottom of the Steadyrack frame.
If you are mount the Steadyrack onto masonry block or brick walls, use the supplied lag bolts and plastic anchors. Mount the frame using the two horizontally-align mounting holes at the top and bottom of the frame. First mark the location of these mounting holes on the masonry wall, then install the plastic anchors by drilling 7/16" holes and tapping in the anchors. The anchors should fit snug and the drilled anchor holes should be deep enough to allow the anchor to be inserted and finish flush with the wall surface. Finally, mount the frame with the lag bolts installed into the anchors.
Another method of installing the Steadyrack frames is to first install a layer of plywood over the wall and then install the Steadyrack frames onto the plywood. This method allows for mounting of the frames anywhere on the plywood, without directly locating them over the wall studs.
To use this method and mount the Steadyrack frames on a plywood substrate, first mount the plywood to the wall studs using heavy fasteners (construction screws or similar). Use fasteners that can support the weight of the plywood and bikes - typically size 9 or 10 screws depending on the number of screws used.
These fasteners should be long enough to penetrate at least 1 1/2" into the underlying stud framing members. I used #10 3 1/2" construction screws. Remember the screws will need to pass through the plywood (1/2" - 3/4") and drywall (1/2" - 3/4") before entering the stud.
For the plywood, I would recommend at least 5/8" - 3/4" plywood. It probably makes sense to use exterior grade plywood or to paint the plywood to help protect it from moisture from the bikes. I used two extra pieces of birch veneer plywood I had.
To mount the Steadyrack frame to plywood like I did, use a short, self-taping construction lag screw. Because of the non-threaded neck of the supplied lag bolts, these fasteners will not hold well into the relatively thin plywood sheathing. A 1/4" or #10 x 1 1/2" construction lag screw will work very well. These screws are also quick to install as they do not require a drilled pilot hole.
After the Steadyrack frame(s) are installed, install the bottom tire-securing brackets. Fasten these brackets to the wall directly inline with the Steadyrack frame at the height of the bike rear tire axle. Steadyrack supplies stainless steel screws to mount these brackets. I used an exterior 1" construction screw that I could drive in with my cordless drill and required no pilot hole.
Load Bikes, check for clearance and function
Once the frames are mounted, load your bike(s) onto the frame and check clearance and function of the rack.
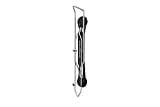
To load a bike onto the Steadyrack, first pull the wheel holder down to it's open position. Next, holding the bike by both handle grips with the front wheel straight up in the air, walk the bike up to the open Steadyrack frame. With the front wheel aligned with the open Steadyrack frame, push the wheel into the frame, lifting and pushing forward with your knee against the saddle if needed. The front wheel should roll onto the Steadyrack pulling the bike forward into the rack.
The bottom wheel should rest into the bottom wheel brace against the wall. If swinging the loaded bike to the side, pull the rear wheel out of the center of the bottom bracket and rest the rear wheel against the side of the bracket you are swinging the bike toward.
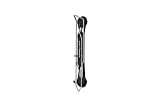
Once loaded, your bike should be an inch or so off the floor. The Steadyrack should smoothly swing left and right and allow you to store your bikes flatter to the wall.
Steadyrack Impressions and Review
After installing and starting to use the Steadyrack bike rack system I am, so far, totally impressed.
For this project I ordered and installed a group of four of the Steadyrack Classic models. Installation of all four racks took less than an hour. The racks seem well built, my only gripe is the snap-on plastic top and bottom caps of the main frame. They are hard to remove and hard to snap back into place. But, once the rack is mounted on the wall you will likely never have to manipulate these caps again.
The important parts of the frame seem really well engineered and made. The frame operates very smoothly and loaded bikes feel very secure and move easily once mounted. All-in-all the Steadyrack system is a great product solves a common, annoying problem for most bike owners. Bravo Steadyrack!