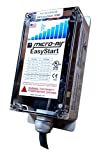
Install of the Micro-Air EasyStart 364 soft ac start device in a Dometic Penguin II RV AC on an Airstream Globetrotter 2020.
RV air conditioning can be finicky and difficult to start when your RV is not connected to full-amperage shore power.
The limited power overhead of less than high-amperage 30 or 50 amp shore power connection, like when using a generator, standard 120v 15a outlet or battery/solar systems, often makes it difficult to start and run an RV air conditioning unit.
Motor soft start devices, like the Micro-Air EasyStart, dramatically reduce compressor startup power requirements and can make it possible to start and run RV air conditioning units under less than idea power conditions.
Micro-Air EasyStart air conditioning soft start device install on our RV dometic penguin II AC
AC units are hard to start – they require an enormous initial energy surge to start their refrigerant compressor motors. This initial inrush current spike, known as the LRA (locked rotor amperage), can pull up to 5 times (or more) the amperage used to run the air conditioner once started.
Since RVs often have limited power reserves (like when connected to standard 15 amp 120v circuits, generators or house batteries), it may not be possible to start an RV’s air conditioning without sufficient high-amperage hookups.
Soft start devices like the Micro-Air EasyStart, reduce the initial amperage demand for air conditioner compressor start up and can make it possible to start and run air conditioners with lower power hookups and even with battery power.
The Micro-Air EasyStart device reduces initial compressor startup amperage by “learning” start up requirements for the connected compressor and then creating a multistep, staged startup program.
The resulting startup program reduces the initial peak startup current by up to 70%, often with a peak startup amperage of just under double the run amperage of the AC unit.
As an example, we have a single Dometic Penguin II 13.5k BTU with heat pump air conditioner on our 202 Airstream 23′ Globetrotter. Our measured peak startup amperage was 58 amps before the Micro-Air EasyStart install and 22 amps after.
After the install and training of the EasyStart unit, we are able to start and run our Dometic Penguin II 13.5k AC off a single 15a 120v circuit. We are also able to start and run the Dometic Penguin II off our 600 amp-hour Lithium Ion battery bank via a Victron Energy Multi-Plus 3000W inverter.
Overview | Micro-Air EasyStart RV AC install
Project Goal: Install and Program the MicroAir EasyStart air conditioner soft start device.
Purchase MicroAir EasyStart and gather tools and supplies.
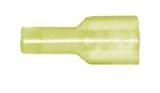
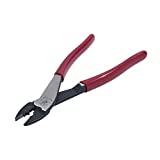
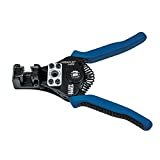
Purchase the EasyStart device. Order the correct unit for your AC size. For AC units of 30k BTU or less (most RV AC units), use the EasyStart 364 model. For tools, you will need a Philips screwdriver, a scissors or sharp blade, a wire cutter and a wire connector crimp tool. For supplies you will need two 10-12 g closed end crimp connectors, a roll of electrical tape and double stick mounting tape.
Mount EasyStart unit and run wire harness to electrical box.
Find a suitable, flat, stable place to mount the EasyStart box. Reference the MicroAir website to download the install PDF for the AC manufacturer of your AC to find recommendations for mounting locations.
For my Dometic Penguin II, mount against the foam wall behind the refrigerant tubing. Prior to mounting the unit, de-oil the surface and back of the EasyStart unit with alcohol. Then mount the unit using double sided mounting tape or the supplied double sided mounting tabs.
Next, run the wire harness to the electrical box. For my Penguin II model, I passed the wire harness through a notch in the unit partition joining the existing compressor wires. Use cable ties to secure the wire harness and keep free of the fan blades or hot surfaces.
Open AC electrical box and pass wire harness into the box.
Locate and open the AC electrical box. Find the punch-out containing the incoming wires from the fan and compressor. Remove the grommet (if there is one) with a flat blade screw driver. There should be room to pass the EasyStart wiring (4 wires) through this same opening. If not, find or create another opening through the control box to pass the wires into the box.
If you have the install kit included with your EasyStart, there will be a replacement higher-capacity grommet to replace the one you removed. The existing grommet will typically be too narrow to accommodate the addition of the four new EasyStart wires. If you do not have a larger grommet (like me), you can use the original grommet by removing the top half and using it as a saddle. If using this approach, wrap several turns of vinyl electrical tape around the wires to protect them from any sharp edges as they pass through the electrical box opening.
Review Wiring/Installation Guide for your model of AC.
Find and review the installation and wiring guide for your particular RV air conditioner. Visit the MicroAir EasyStart 364 page and follow the links to the guides for your family of air conditioner.
Depending on the model of your RV AC, your unit may or may not have a start capacitor with or without a PTCR (Positive Temperature Coefficient Resistor). My Dometic Penguin II has both, which will need to be disconnected from the circuit.
The EasyStart unit is essentially replacing the start capacitor and PTCR with a smarter, programmed version of a start capacitor. In fact, the EasyStart has its' own start capacitor built into the unit.
To remove the start capacitor and PTCR wiring, reference the EasyStart install instructions and wiring diagrams. For my Dometic Penguin II, the start cap is located at the bottom of the control box and the PTCR is mounted on the lower left side. This start circuit of the PTCR and start capacitor is wired to the run capacitor is made with two red wires and one white wire - one red wire from the HERM terminal of the run capacitor to the PTCR, one red wire from the PTCR to the start capacitor, and one white wire from the start capacitor to the C terminal of the run capacitor. Remove all three wires.
Connect the Four EasyStart Wires.
Complete the wiring of the EasyStart unit by connecting the four easy start wires (black, white, orange, brown) to their proper connections. Two of the wires (orange and white) come with installed jacketed spade connectors and will connect to the run cap. Two of the wires (black and brown) have no connectors and will be spliced to existing wire connections. If you have a different RV air conditioner, the following wiring instructions may be different.
Brown Wire: The brown wire is end spliced to the white wire from the compressor after it is removed from the run capacitor. First, locate the white wire coming from the compressor going to the C terminal of the run capacitor. Once located, remove the wire wire by gently pulling off the spade connector using a needle nose plyers or similar. Cut the spade connector off and strip 1/2" of the wire jacket off the end cut wire. This stripped white wire is spliced to the EasyStart brown wire. Complete the connection using a end-to-end or closed-end crimp connector rated for line voltage ( 600V-rated, not low voltage automotive connectors). Protect this connection by wrapping several turns of vinyl electrical tape around the connector.
Black Wire: The black wire is 3-way spliced onto the blue wire from the compressor once cut. Locate the blue wire coming from the compressor which plugs into a control board mounted relay. Pick a spot on the blue wire that will give you two approximately equal lengths of blue wire within the electrical box to splice the black EasyStart wire to. Strip the last 1/2" of insulation off the two blue wire ends and the black EasyStart wire and combine with a butt-end crimp splice connector. If you have the EasyStart install kit, there will be a length of black wire to use as an extension for the blue wire connection. You can use this for extra length and ease of making this connection or do I as did and just cut the blue wire to make the connection. Beware that the connection made directly by simply cutting the blue wire results in a fairly short connection. Protect this connection by wrapping several turns of vinyl electrical tape around the connector.
Orange Wire: The orange wire should have a spade connector already attached, if not add a line voltage rated connector and then connect it to any open terminal at the HERM post of the run capacitor.
White Wire: The white wire should have a spade connector already attached, if not add a line voltage rated connector and then connect it to any open terminal at the C post of the run capacitor.
Double Check Wire Connections.
With all connections complete, double check your work.
Trace each connection and verify against the wiring diagram from MicroAir. If you have a multimeter, you can use it to check continuity to ensure the proper connections for the spliced connections.
To Review:
White Wire - connects directly to the run capacitor "C" terminal group (there are typically other white wire connections on this terminal on the capacitor). Orange Wire - connects directly to the run capacitor "HERM" terminal group (there is typically another red wire connected to this terminal on the capacitor). Black Wire - splice connection to blue (or black) wire that runs from the compressor to a relay on the control board. Brown Wire - splice to the white wire that runs to the compressor.
Perform the EasyStart Learning Process.
Once all the electrical connections are made, the EasyStart device needs to "learn" your compressor start needs and self-program through a cycled learning process requiring 5 separate, spaced AC starts (with a compressor start).
Before cycling the air conditioning, connect your RV to an adequate external AC circuit which can reliably start and run your air conditioning - ideally a full amperage (30a or 50a depending on your RV) shore power connection. Some unit may be able to start and run on a 20a circuit and can successfully complete the learning process.
If you are at home and unsure if the outlet is a 20a circuit, inspect the plug-in receptacle. A 20a receptacle will have a horizontal notch in the larger of the two slots. Common locations for 20 amp circuits at home include the kitchen, a bathroom and the garage.
With external power connected, set your thermostat to a temperature colder than the ambient temperature and start the AC. When starting the AC, typically the fan starts first and then the compressor will start after a shore delay. Let the AC run for another 30 seconds after the compressor starts, then stop the AC. Wait 3 minutes, then repeat the process a total of 5 times. The 3 minute wait between restarts is required because the EasyStart unit will delay compressor start for 3 minutes after the AC is started.
After the 5 cycles, the EasyStart will learn the starting requirements of your air conditioner and create a program for future starts. Your AC startup process should require much less (60 - 75%) peak amperage to start and run. Most RV AC units will now be able to start with lower capacity power connections like a 15a AC circuit, a 2000W generator or even with battery powered inverters of > 2000W.
After installing and training our EasyStart, our 2020 Airstream Globetrotter with a single Dometic Penguin II 13.5K w/ Heat Pump AC will start on a 15a AC circuit or on our batteries connected to our Victron Energy Multi-plus 3000VA inverter.


One Comment