RV solar systems - how it all works and how to do it yourself.
Installing a solar-powered rechargeable DC energy system is one of the most impactful improvements you can make for your RV. This article and the related follow-on articles document my experiences installing solar, lithium batteries and all the related components in our new 2020 Airstream Globetrotter 23′ FBT.
This initial article gives an general overview of how RV rechargeable DC energy systems work. Additional articles will detail the individual components of the RV electrical system (solar panels/solar charge controllers, inverters, wiring/fuses/buss, monitors/controllers) and provide step by step DIY install guides showing how I did it and the components I used.
RV solar panels on the roof of our Airstream RV travel trailer.
RV solar systems convert sunlight into electrical energy that can be used to power your RV by recharging your RV batteries and directly supplying electricity to devices within your RV. These two solar system functions, charging and direct power, allow for prolonged or even sustained off-grid electrical use with your RV.
Off-grid RV energy use depends on a “house” RV battery bank. RV battery bank capacity is limited by size, weight and budget and alone can only provide finite periods of energy. However, when paired with a properly sized solar array, a near perpetual supply of electrical energy is potentially available for use within your RV, depending on the specifics of your system.
With everything connected, balanced and working, a properly sized RV solar and rechargeable energy system should be able to provide an uninterrupted source of regenerating energy for your RV! Awesome.
In addition to solar panels and batteries, a few other components are needed to the RV solar energy system.
For starters, a solar charge controller sits between the solar panels and the battery bank, controlling the flow and voltage of the current from the solar panels to the battery bank and DC power panel.
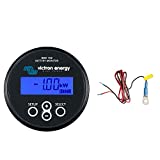
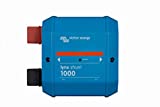
A battery monitor tracks battery state of charge, temperature and energy use of your system.
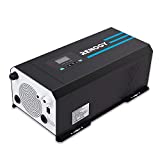
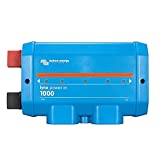
If you would like to use alternating current (for example120v AC) within your RV, you’ll need an inverter, which transform DC current into AC current. More advanced units also control AC charging of the RV battery back via connected shore power. These units are known as Inverter Chargers.
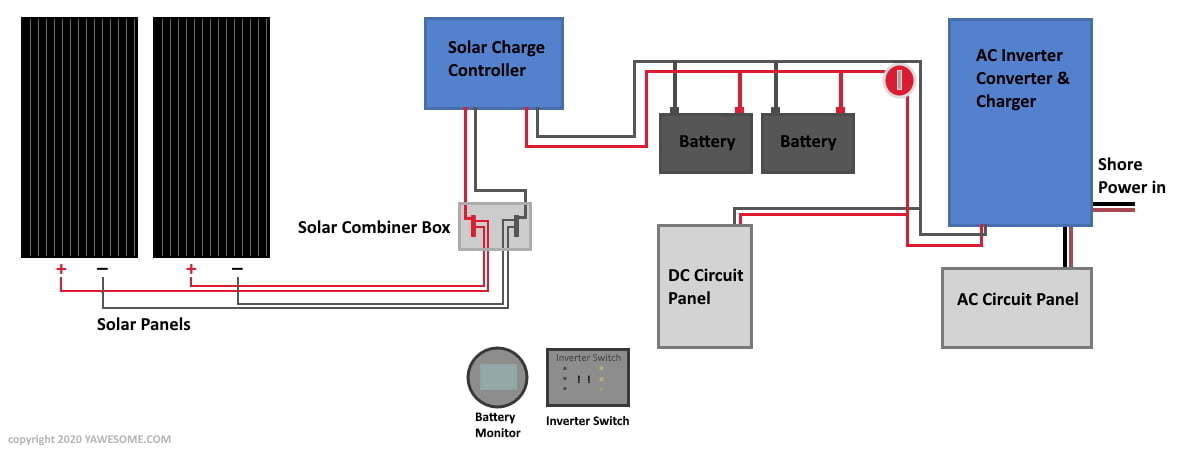
To break it down, here are the major components of a RV rechargeable energy system:
The major RV power system components:
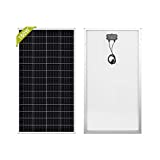
Solar Panels (converts sunlight into DC current and passes current to #2)
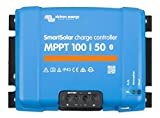
Solar Charge Controller (converts DC current from solar panels to lower voltage DC current for battery charging and direct DC device use)
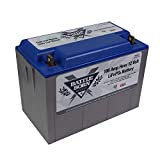
Batteries (stores DC current)
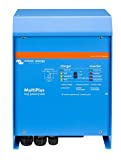
Inverter/Converter/Charger (Inverts DC current into AC current for AC device use, Converts AC current into DC current for DC device use and Charges batteries using AC current if connected to AC shore-power)
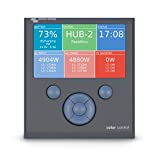
Battery Monitor, System Monitors and Controls (monitors battery charge, current use, solar charging, inverter use, AC battery charging, etc.)
Wiring, Buss Bars, Fuses, Switches (safely moves electrical current between components and devices)
RV solar and connected DC electrical system diagram
Our Dive Into RV Solar Systems
When we bought our new Airstream travel trailer, I knew we wanted to spend a good portion of our time off-grid, at smaller campsites and national parks. We knew we needed an RV solar system, yet we weren’t exactly sure what that meant.
When negotiating our camper purchase, I tried to get the dealer to throw in the optional Airstream solar package. The dealership declined, and I’m so glad they did.
The factory solar add-on for the Airstream offered a 90 watt or a 180 watt solar panel package with upgraded batteries, a solar charger and a battery monitor. A nice package for those looking for brief periods of battery use, but not a system that would easily run our coffee maker or free us from the electrical post.
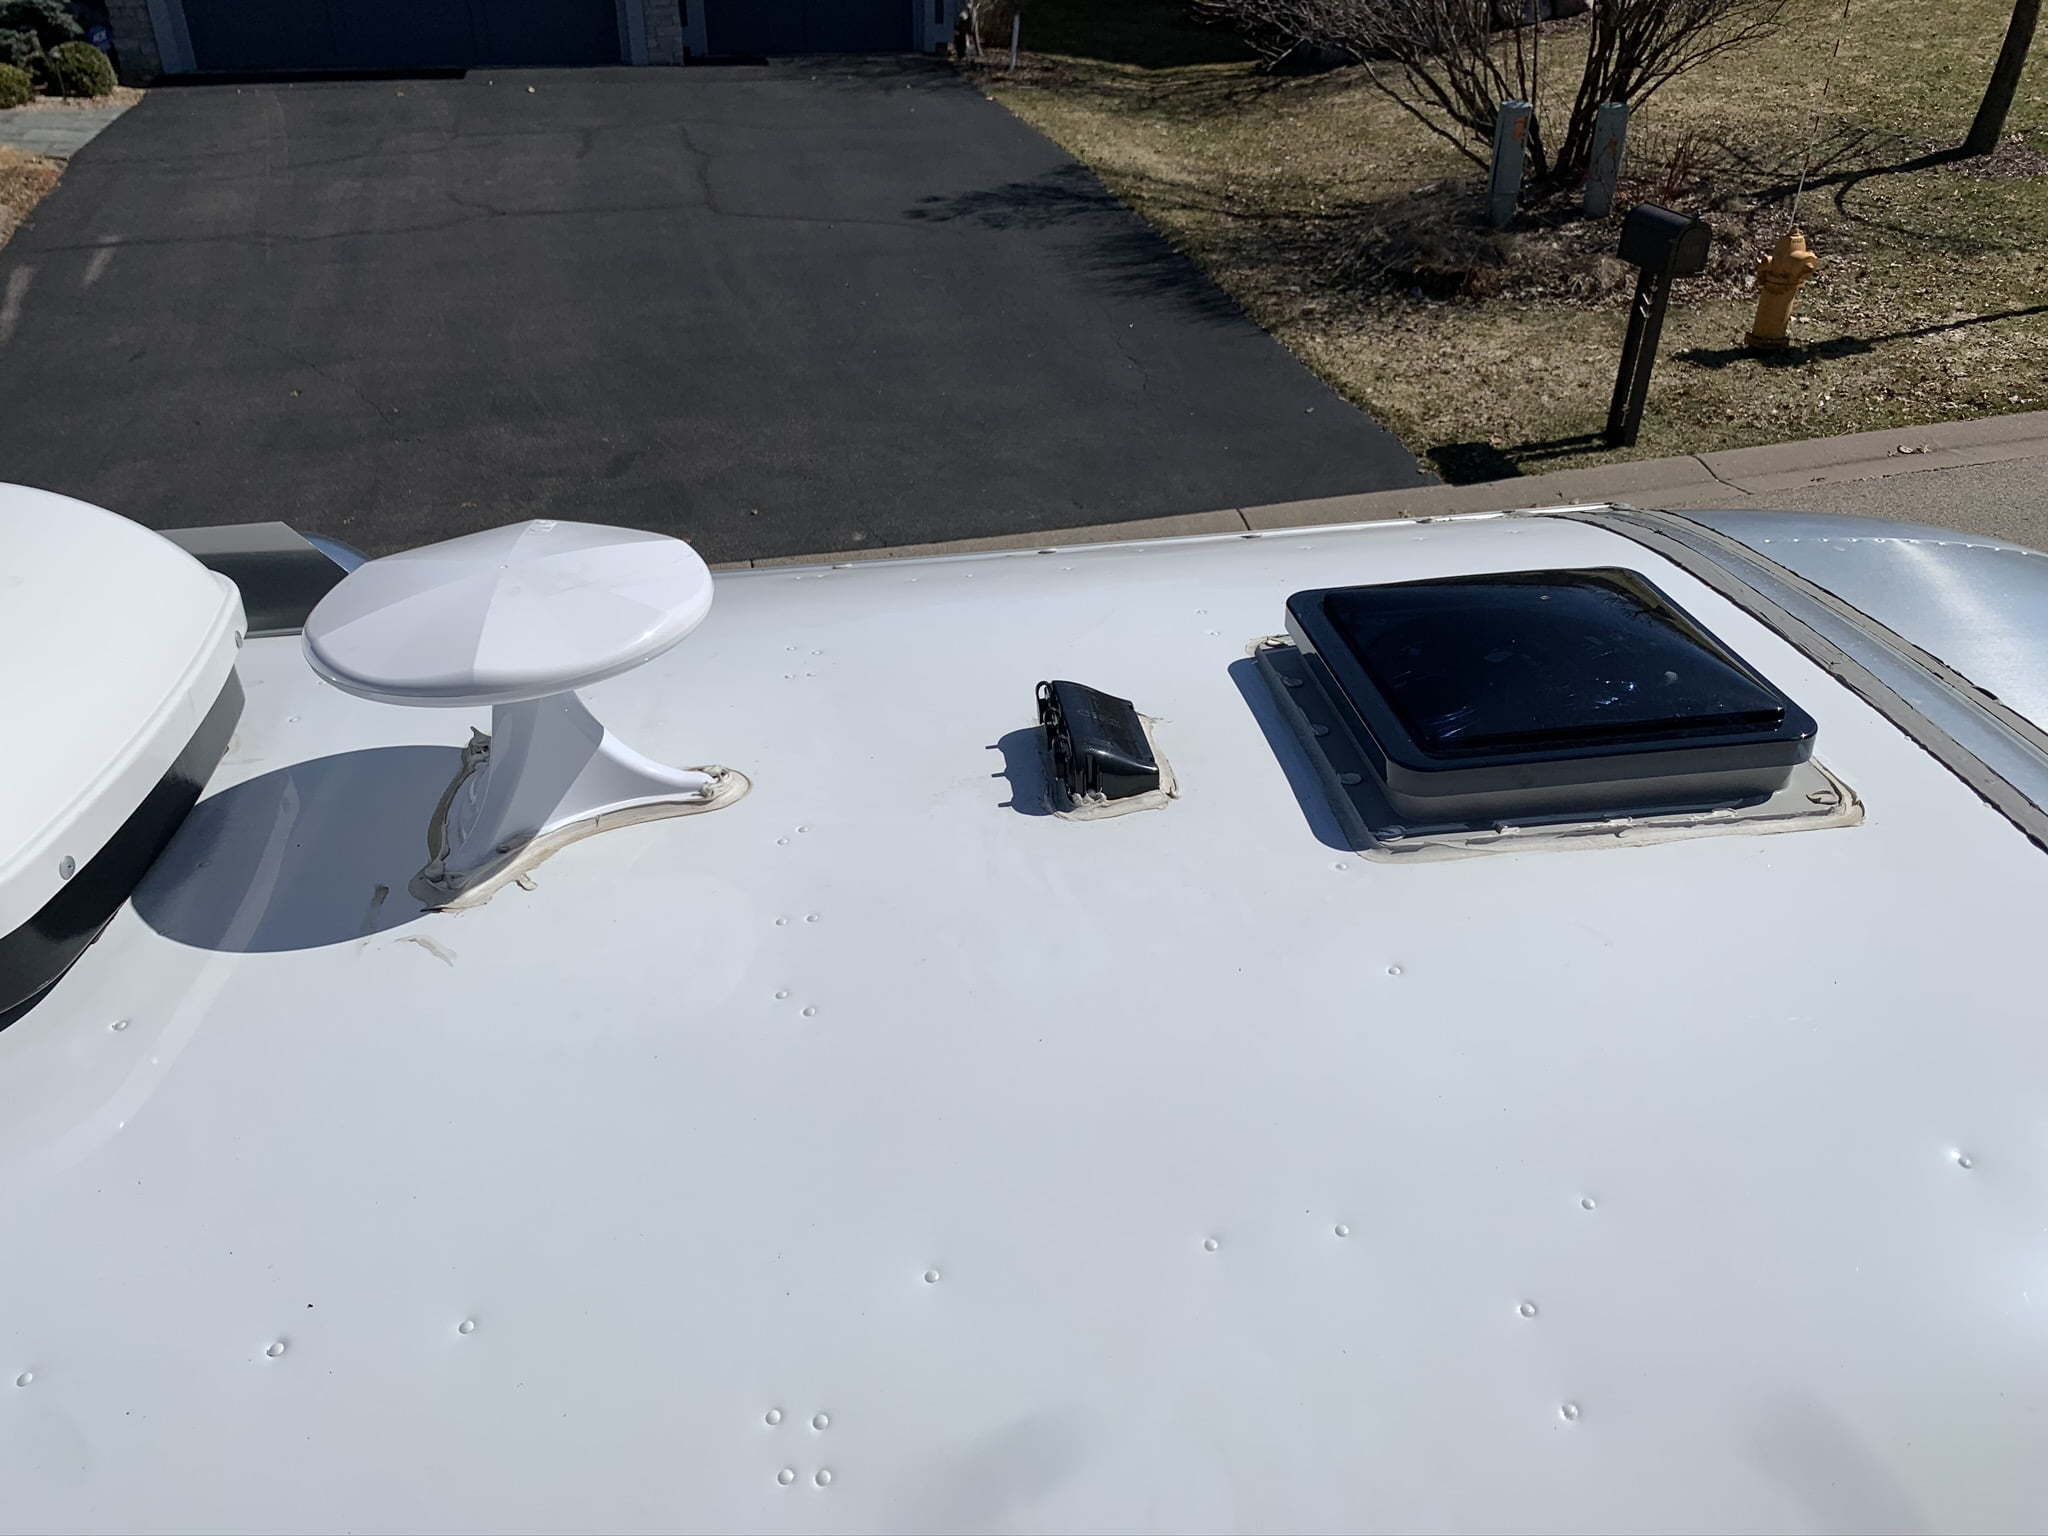
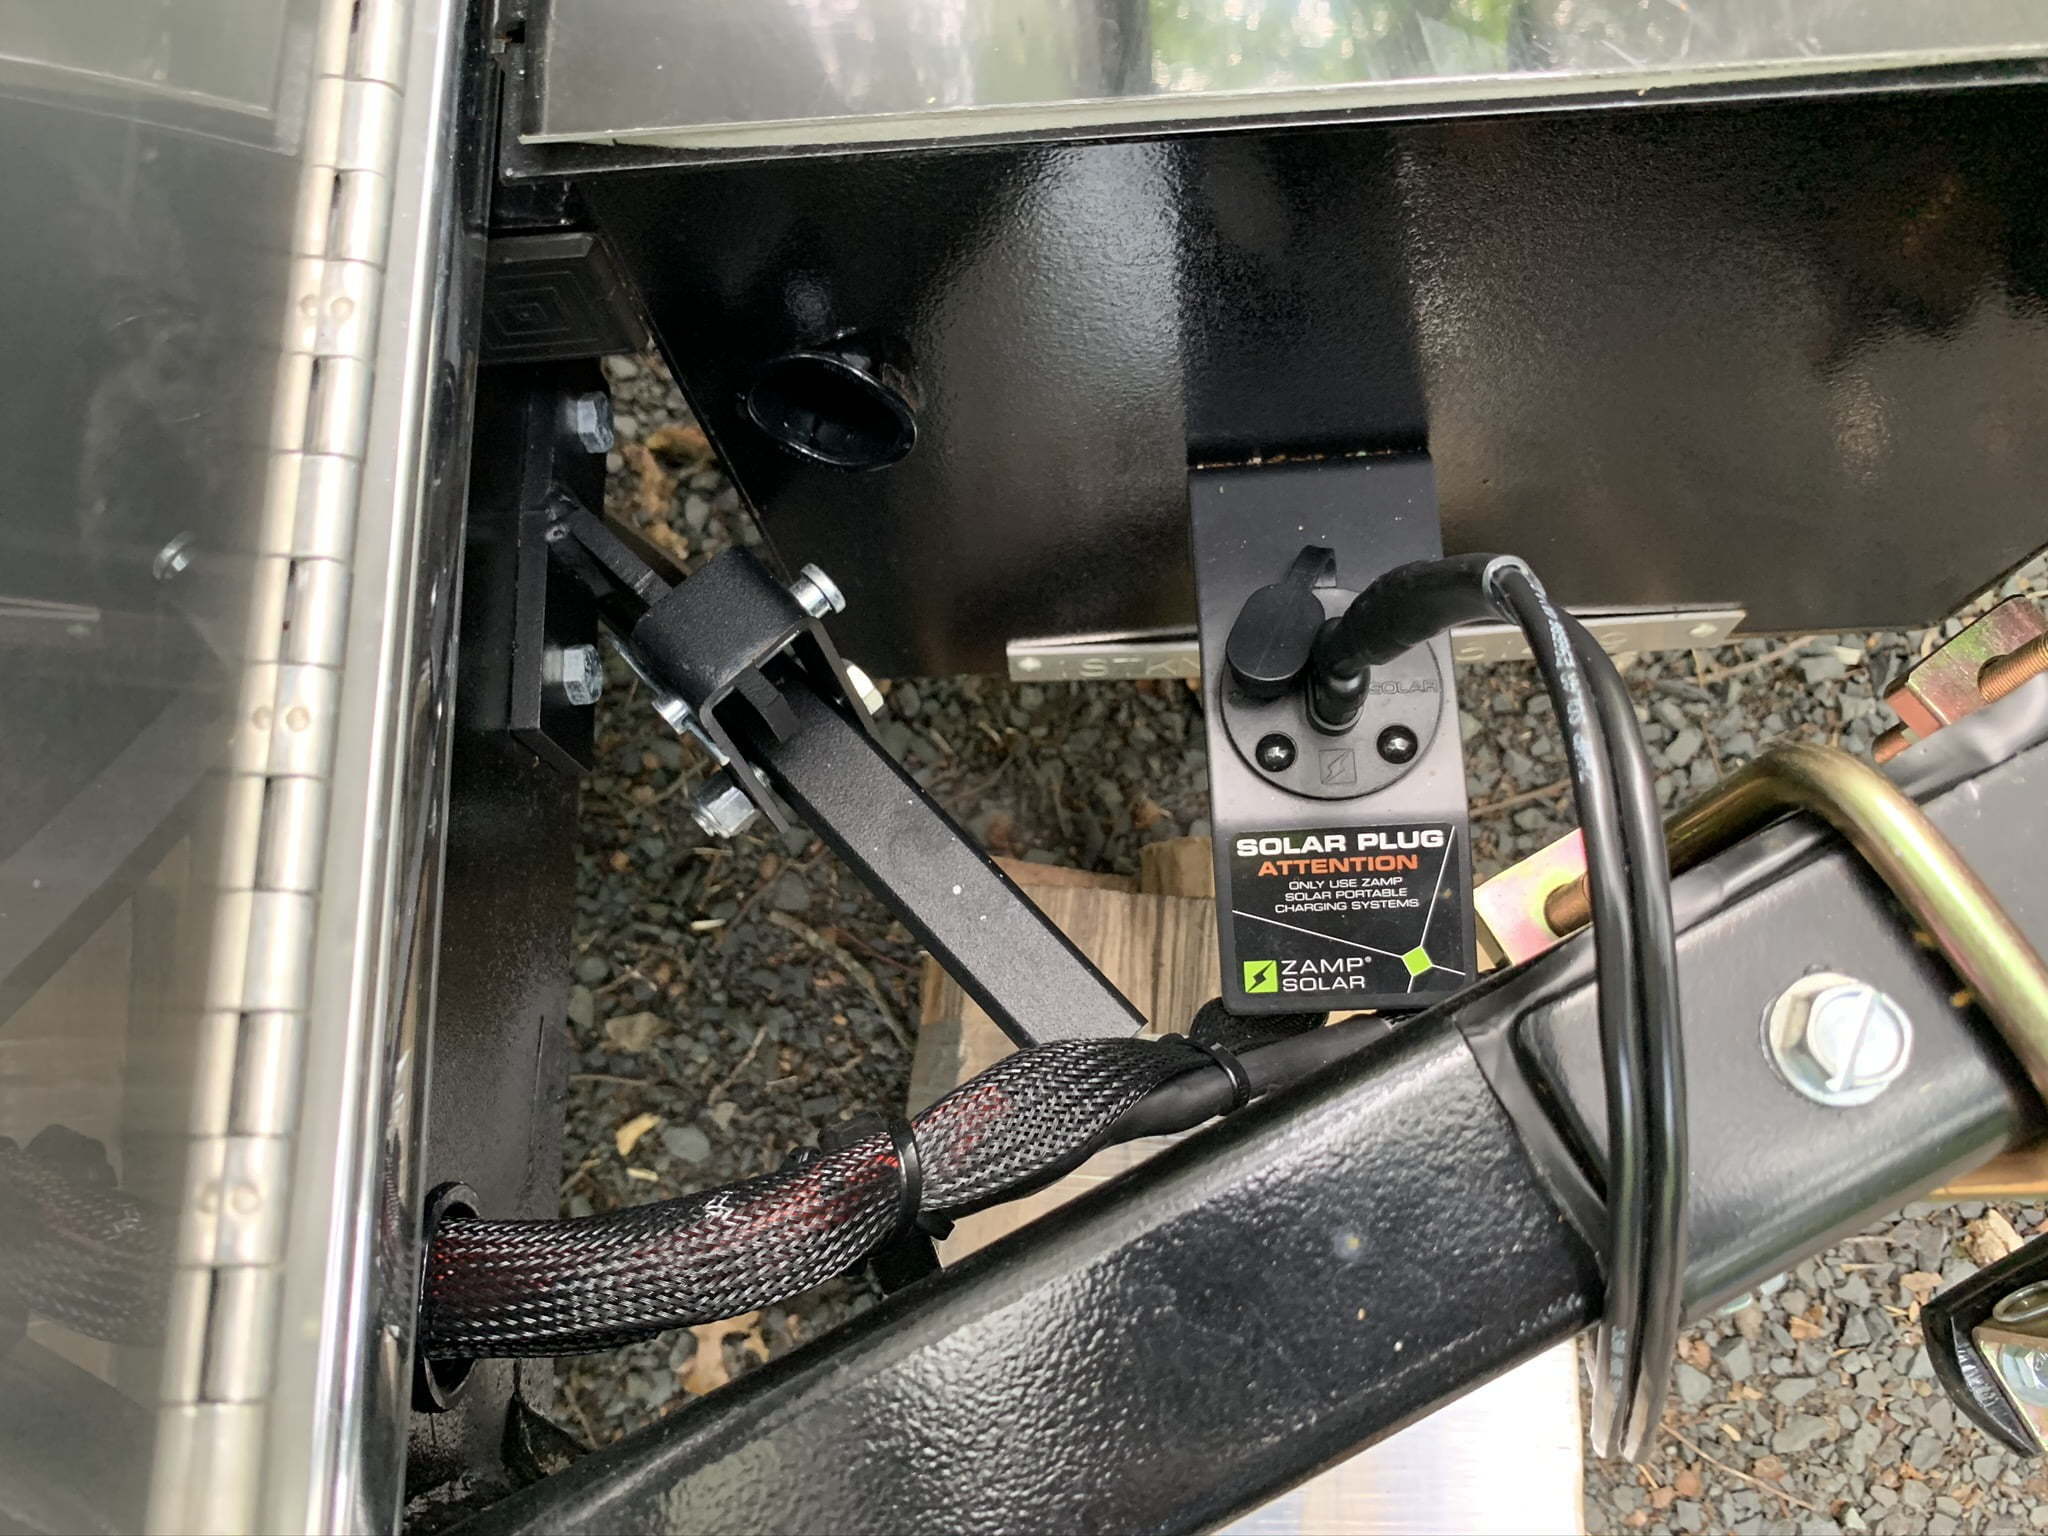
While we didn’t get the factory solar add-on package, I was happy to learn that the Airstream was prewired for solar. Our Airstream trailer came from the factory with a roof top Zamp Solar 3 port roof cap junction box and a Zamp Solar single port solar plug on the tongue frame of the trailer. All we needed to do was add solar panels… Well, sort of. We soon learned that adding solar wouldn’t be as easy as tossing a few panels on the roof. Welcome to the world of RV solar.
Airstream Globetrotter roof with Zamp Solar 3 port roof cap included from the factory on our Airstream.Single port solar panel plugin mounted to the front frame of our Airstream.
The Zamp pre-wire was a start, but in addition to solar panels, we would need; a solar charge controller, new batteries (the Airstream came with two modest lead-acid 12v batteries), an upgraded inverter, upgraded battery cabling and system wiring, and a better battery monitor. What a project!
The plan was first to do some research on RV solar system builds and equipment, and then spend some all of my vacation time to install an entirely new system including:
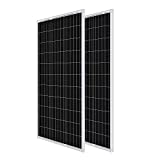
Rooftop solar panels
Lithium battery bank
Solar charge controller
Inverter/charger
Bus bar/fuses/heavy cabling
Getting Started Planning an RV Solar and Rechargeable Energy System
One of the first tasks in building or upgrading a system is to estimate your energy needs. Then with an idea of how much energy you need/want, consider your options for system size your RV and budget.
RV solar systems require a handful of components that are all fairly expensive. Batteries are typically the most expensive and often consume 40% or more of a system cost.
Here is a very rough estimate of RV solar/rechargeable energy system cost percentage, which change considerably and overweight batteries with increasing system size:
Batteries 40%
Inverter/charger 20%
Solar panels 20%
Solar charge controller 10%
Cabling, fuses, monitors 10%
Most of your RV solar budget will/should go toward batteries. We will talk about batteries more in a dedicated RV battery article, but here is a the big picture:
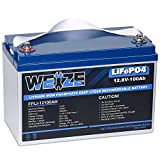
Lithium (LiFePO4) batteries are by far the best and most expensive. They can be discharged to 80 – 90% of rated capacity (DOD – depth of discharge) compared to 50 – 60% for lead batteries, are much lighter (40% of lead), recharge much quicker (4-5x!) and last much longer.
AGM (Absorbent Gas Mat) – upgraded lead-acid technology and better than traditional lead batteries. Not as good as lithium. These batteries are more expensive than “deep cell” traditional batteries but cheaper than lithium. These batteries use tightly packed, thin fiberglass reinforced lead plates for higher performance. These batteries hold more energy compared to traditional lead batteries and are maintenance free (don’t require adding water). But, like traditional lead-acid batteries can only be discharged to around 50 – 60% of rated capacity and don’t last as long as lithium batteries.
Traditional Lead Acid (deep cell) batteries are the least expensive, but worst performing and heaviest battery options. These are the batteries that typical come with your RV. They are very heavy for the amount of available energy, recharge slowly and tend to lose charge over time. Many also require adding water.
Depending on the type of batteries you purchase, their cost will consume up to 50% of a typical RV solar project budget. Many entry level projects start with traditional or AGM batteries because their upfront cost is lower. This may not make sense long term.
Lithium batteries offer nearly twice as much power capacity (80-90% depth of discharge – DOD) compared to lead-acid batteries. They also recharge much quicker, take up much less space and weigh a lot less compared to lead. And, if you ever plan to upgrade your system, you will probably eventually move to lithium batteries, allowing you to add-on to your existing battery bank instead of wasting your initial investment in lead-acid batteries (you cannot mix lead-acid and lithium batteries).
I strongly recommend starting with lithium batteries. The price of lithium batteries will decrease with time as well, and there does seem to be more choices for less expensive lithium battery options available.
After batteries, solar panels and inverters each eat up around 20% of an RV solar budget. The cost of solar panels has dropped over time. Good quality solar panels can be purchased for around $100 for a 100 watt panel. Inverter/charges will consume a similar amount of the budget depending on the type and quality of the unit.
The remaining 20% of your budget should buy you a quality solar charge controller, large gauge DC cables, appropriate fuses and switches and a good battery monitor. More expensive systems often add remote, wall-mounted monitors and controls to the system too.
The bottom line is: RV solar / DC energy systems are a significant investment. My advice for those buying their first system is this:
Skip dealer installed factory optional systems if you have any DIY in you.
Consider portable suit case units with charge controllers for very limited budget, beginner systems (less than $500). These will connect directly to your existing batteries and be used as an add-on system.
Buy lithium batteries, even for smaller beginning built-in systems. You can always add more batteries as your system grows.
Buy good quality components – brands like Victron Energy, Xantrex, Magnum Energy, Zamp, +/- Renogy.
Down the Path to RV Solar – Start by Estimating Your Energy Needs and Desired System Size
Maybe the best way to start designing your RV solar system, is to estimate your desired daily RV energy use.
Do this by logging your RV energy use, or if you are an RV newbie or have a new rig, start by creating a list of devices you would likely use in your system.
There are a bunch of on and offline resources to help you build a device list and energy draw amount for the devices. RV owners manuals and sales brochures often list the specific models of devices used in a particular RV to help you develop a reasonably accurate energy survey for your RV.
RV forums can be helpful too. Many forums are RV brand specific and will often discuss, in detail, the energy demands of the different systems for your RV. For Airstream travel trailers, Airforums.com is an excellent resource, for example.
Estimating Your Off-grid RV Energy Requirements
Start by creating a list of all of the devices you would like to power with your system. Include everything from RV maintenance items (lights, tongue jack, stabilizers, water pump, etc.) to AC appliances.
Once you have a complete list, add up the amps (or watts) draw for each device for the period of time you recorded use. The goal is to obtain an estimate of average daily energy use in amp hours (Ah) or watt hours (Wh).
Watt Hours and Amp Hours
Electrical power represents work over time, and is often expressed as watt hours (Wh) and amp hours (Ah). The concept of amp hours will become very clear over time and really is as simple as it sounds – watts or amps per hour. Just think of watt hours or amp hours as a quantity of energy, similar, to say, a gallon of gas. Batteries hold amp hours just as a fuel tank holds gallons of gasoline.
To estimate your daily RV electrical energy use, build a list of devices and the hours use (or fraction of hours use) adding them to obtain a total per day, expressed in watt hours of amp hours of electricity.
To help you get started and for example purposes, I’ve added a few tables of commonly used RV devices and their amp draw during use. Add up amp-hours (12v Ah) used by a device by finding the amp draw amount for the device and multiple it by the amount of hours used per day. If used only for a few minutes, multiple the amp draw by the fraction of hour use.
For example, if you used a device for 15 minutes, the hour equivalent is 0.25 hours. For 6 minutes, the equivalent is one tenth of an hour or 0.1 hours. To find the amp hours for the device use, multiple the amount of hours use (0.25 hrs if 15 minutes for example) by the amp draw of the device. A 1 amp draw device used for 15 minutes (0.25 hrs) uses 0.25 amp hours (Ah).
Here is an example formula:
Device amps x hours used/day x number of these devices used = amp-hours/day for that device
Example for LED lights in your RV:
0.3 amps per LED light x 3 hours use/day x 10 total LED lights = 0.3 x 3 x 10 = 9 amp hours/day for LED lights
Here is a table of minute to hour fractions (just divide the minutes by 60 for hours)
Our total energy use for this example survey is 173Ah per day.
As you can see with this example, energy use adds up quickly. This is a fairly liberal electrical use, but it is similar to what my wife and I have used on recent trips.
Daily RV Amp Hour Energy Use Determines Your Ideal RV Energy System Size
The goal of estimating your daily RV energy use is to give you an idea of the system size you will need and target the proper size battery bank, solar array and system components.
In our example above, a battery bank would need to supply the 173Ah per day minus any charging from solar. Most would also add a buffer, maybe 20%, bringing the daily total to 208Ah.
To supply just one day of 208Ah, you would need 260Ah of lithium battery capacity (assuming an 80% depth of discharge) or 420Ah of lead-acid battery capacity (assuming a 50% depth of discharge). More on batteries later.
Just for comparison, the Airstream factory installed Interstate deep cell SRM-24 batteries have about 84Ah capacity each. Unfortunately these batteries are lead-acid chemistry batteries and have a recommended depth of discharge rating of 50%, leaving us with a total of 42 Ah capacity per battery or 84 Ah for the pair. In this example, our two Interstate factory batteries would last less than half the day with the above energy use without any active charging!
As you can see from our simple example batteries are important and will be the primary system limitation. This is why most of your budget will go toward batteries.
Once you have a target for daily amp hour (Ah) draw for your system, you can begin targeting the size of your ideal battery bank, solar panels, solar charge controller and inverter/charger.
Estimated Battery Bank Size
An ideal battery bank is one that has the capacity to run your system for the amount of time between charges plus an added energy reserve based on your risk tolerance.
Here are the battery bank sizing variables:
Daily system energy draw (in Amp Hours)
Days of desired reserve capacity (2 – 4 days or longer depending on your typical trip length)
Battery Charging resources (solar, shore power, vehicle DC – DC), amount of recharge and interval
Desired energy reserve and system variability
+/- Backup power sources (generator)
With our 208Ah daily energy draw estimate, and a 2 to 4 day reserve capacity, we get a battery bank size of 400 – 600Ah assuming no re-charging or alternate energy use (generator, etc.) and little energy reserve.
Since depth of discharge is limited to 50% of lead-acid battery capacity and 80% of lithium-ion, this example suggests a battery bank size of:
480 – 720Ah of lithium batteries
800 – 1,200Ah of lead-acid batteries
For battery banks of this size, that’s around 10 deep cell lead-acid batteries with a cost of $1,200 to $3,500 and a weight of over 500 pounds or 5 lithium-ion batteries with a weight of 150 – 200 pounds, but at a cost of $3,000 to $5,000! Wowzer!
So, how do you realistically make this all work?
Your RV will only have so much room and weigh capacity for a battery bank, not to mention your budget.
Making the Most of your RV Battery Bank:
Add power back to the system with solar panels!
Use less energy, be more efficient
Use lithium batteries if you can afford them
Mix off-grid with plugin sites for battery recharging days
Use generator or DC-DC vehicle charging as a backup
As our example shows, adding energy back to the system is very important. Energy generated by solar, decreases the battery draw and recharges the battery banks.
And this is the importance of solar – energy generated from solar panels will add energy back into the system, allowing you to draw less from your batteries, recharge them and have an overall smaller battery bank.
Estimated Solar Panel Array Size
With an estimated system size and a target battery bank size, choosing the size of your solar panel system is fairly straightforward. Most RV solar systems will be sized to compliment the battery bank size, the desired direct energy contribution of solar and a few other variables. Here is a list of RV solar array sizing variables:
Battery bank size
Total system size
Sun availability, time of year, location
Desired reliance on solar vs. shore power, other
Available roof space, type of batteries (lithium are much easier to recharge)
Probably the most import factor in sizing your solar array for RV systems that will primarily rely on solar recharging is the size of your battery bank and how quickly you would like to recharge your system.
For many, a solar array should be able to recharge about 50% of your daily energy use or 25% to 30% of your battery bank capacity per full-sun day.
Using our example above with a 208 Ah daily energy draw and a 500 Ah battery bank (lithium), you would target building a solar array that could supply 104 Ah (50% daily energy use) to 125 Ah (25% battery capacity) back to the batteries or system each day. This is what that would look like:
104 Ah needed for 50% of 208 Ah daily energy use
Each 100 watt solar panel will realistically produce ~ 80w, not 100w
100w panels operate at ~ 18 volts
A 100w panel will generate about ~ 4.5 amps in full sun per hour (80w / 18v = 4.4 Ah)
5 – 6 hours of optimal sunlight yields ~ 25 amp hours (Ah) energy generation per 100w panel
4 – 6 100w panels should generate 100 – 150 Ah per day and meet our 104 – 125 Ah target.
So, for our example we would target installing a minimum of 400w to 600w of solar. You could met this target with 4 – 6 100w panels or 3 – 4 150w panels. The panel size doesn’t really matter. It is typically best to use the same panels or those that operate at about the same voltage to reduce energy lost due to differences in panel voltages (more on that later in the Solar panel article).
Obviously any solar array will be subject to a variety of variables including sun quality, time of year, panel shading, component efficiency, etc., and oversizing systems makes sense within the limits of your roof space, budget and other limitations.
Component Sizing
Once you have an estimate for total system size, battery bank size and solar panel array size, choosing corresponding components for the system is fairly straightforward.
Matching a solar charge controller to your system:
The solar charge controller size will match the solar array size, typically listed in Amps. A 300w solar array at 18v can generate 17 amps (300w/18v= 16.7a).
If your system is 300w, you can use a 20a or higher capacity charge controller.
If your have a 500w solar array, you can use a 30a or higher capacity charge controller.
If you have a 800w solar array you can use 50a or higher capacity charge controller.
In addition to an amperage rating, solar charge controllers will also have an input voltage limit.
Most RV panels will operate at ~ 18v, but if wired in series, the voltage can be much higher and must not exceed the charge controller rating.
Solar charge controller capacity rating are often in the format of input voltage limit / input amperage limit. Example: 100/30 would be 100v input limit and 30a input limit and compatible with a 500w array running at less than 100v.
Matching an inverter/charger for your system:
Size and choose an inverter based on your desired alternating current (AC) use:
1,000w inverter delivers a total of 8 amps of 120v current (1,000w/120v = 8a)
2,000w inverter delivers a total of 16 amps of 120v current (2,000w/120v = 16a)
3,000w inverter delivers a total of 24 amps of 120v current (3,000w/120v = 24a)
5,000w inverter delivers a total of 40 amps of 120v current (5,000w/120v = 40a)
Size and choose an inverter based on your battery and cabling current (amperage) capacity:
1,000w inverter requires 80 amps of 12v current (1,000w/12v = 80a)
2,000w inverter requires 160 amps of 12v current (2,000w/12v = 160a)
3,000w inverter requires 240 amps of 12v current (3,000w/12v = 240a)
5,000w inverter requires 400 amps of 12v current (5,000w/12v = 400a) or 200 amps of 24v current (5,000w/24 = 200a)
Choose an inverter based on features (sine wave, monitoring, battery charging, power transfer switching, etc.)
Matching cabling, monitors and controls for your system:
Component controls and monitors often designed for specific components by the same manufacturer
Additional feature considerations (wifi, bluetooth connectivity, etc.)
Picking components for your system often depends on budget and system size. I would recommend avoiding most of the discount products easily found online, especially for bigger systems. Running 200 amps of 12v current into a cheap inverter over long periods of time within the confines of an RV probably isn’t worth the cost savings. Pick equipment that professional installers and RV makers use – brands like Victron Energy, Zamp Solar, Magnum Energy, Xantrex and Progressive Dynamics are likely safe choices.
Tiered Examples of RV Solar/Rechargeable Energy Systems
Below are a handful of example RV solar/rechargeable energy systems. These examples should give you a general idea of cost and capabilities of different level systems, including estimates of energy output, batteries, solar panels and run time capacities and compatible device lists. These categories are rough estimates and provided just as examples to give you an idea of what these systems and can and what to expect for cost, as well as some hardware to consider for a system.
When building your system, I highly recommend spending a tad more to buy items that will not be obsolete when later upgrading your system – items like a Victron SmartSolar MPPT solar charger that works for lithium and is bluetooth ready, and a high quality and reasonably-sized inverter/charger (Victron MultiPlus for example). I would also just bite the bullet and spend the money for lithium batteries to start with – they are superior in so many ways compared to AGM, Gel, Deep Cell lead, etc. – just do it!
Low Energy – Limited Capability Systems – less than 2,000 watts (<$2,000)
Solar Panels: 1 – 2 solar panels for 100 – 300 watts
Amp Hour Capacity: 100 – 200 Ah
Run Time: limited use for 1 – 2 days without full recharge
Typical Inverter Capacity: 1,000w – 2,000w = up to 10A – 20A of 120V current
Example Device Use:
short periods of low-moderate energy devices (lights, phone/computer charging, limited use of fans, LCD TV, stereo, power awning, tongue/leveling jacks)
very limited use of moderate – high energy devices (AC device use significantly limited by inverter rating)
Example Hardware – $1,650 System (excluding cabling, fuses and switches)
Solar Panels: 2 – 4 solar panels totaling 300 – 400 watts
Amp Hour Capacity: 200 – 300 Ah
Run Time: moderate use for 1 – 2 days without full recharge, or 3 – 4 days with partial recharges
Typical Inverter Capacity: 2,000 – 3,000w = up to 20A – 30A of 120V current
Example Device Use:
moderate periods of low – moderate energy devices (lights, phone/computer charging, fans, longer use of LCD TV, stereos, water pump, occasional use of heater fan, smaller kitchen appliances, power awning, tongue/leveling jacks)
short periods of moderate – high energy devices (smaller coffee makers, hair dryer, toaster – AC device use limited by inverter rating)
Example Hardware – $3,150 System (excluding cabling, fuses and switches)
Moderate Energy Near Independent Capability Systems ($5,000 – $10,000)
Batteries: 4 – 6 lithium-ion batteries
Solar Panels: 5 – 7 solar panels totaling less than 500 – 900 watts
Amp Hour Capacity: 400 – 600 Ah
Run Time: nearly unlimited use for 1 – 2 days without full recharge, or 3 – 7 days or more with partial recharges
Typical Inverter Capacity: 3,000W = up to 30A of 120V current
Example Device Use:
prolonged periods of low-moderate energy use (lights, phone/computer charging, fans, LCD TV, stereo, power awning, tongue/leveling jacks)
limited periods of moderate – high energy use (electrical refrigerator, ducted furnace blower fan, coffee makers, microwave oven, hair dryer, RV water heater in 12v mode, space heaters, +/- air conditioner – AC device use limited by inverter rating)
Example Hardware – $6,000 System (excluding cabling, fuses and switches)
High Energy Full Capability Systems – 5,000+ watt systems (>$10,000)
Batteries: 6+ lithium-ion batteries or specialized lithium battery products
Solar Panels: 9 – 12+ solar panels totaling more than 1000 watts
essentially unlimited use for 2 – 4 days without full recharge, and nearly unlimited use with partial recharges
Typical Inverter Capacity: 4,000W – 6,000W = up to 40A – 50A of 120V current
Example Device Use:
long periods of low-moderate energy use (lights, phone/computer charging, fans, multiple LCD TVs, stereos, power awning, tongue/leveling jacks, water pump)
longer periods of moderate – high energy use (electrical refrigerator, ducted furnace blower fan, coffee makers, microwave oven, hair dryer, RV water heater in 12v mode, space heaters, +/- air conditioner – AC device use limited by inverter rating)
Example Hardware – $15,000 System (excluding cabling, fuses and switches)
Follow On Detailed Articles and Documentation of My Solar Project Component Install
Getting Started on Your RV Solar System
After reading this RV solar overview, you should have a general idea of how RV solar systems work and an estimate of the amount of energy your system may need. This is a start. Before buying solar panels, batteries and other equipment, read additional materials to help you better craft a well-matched energy system for your RV.
Search forum for threads discussing energy systems for RVs of similar size and those with similar goals as your own. Take the time to mock up systems by diagramming the entire system prior to purchasing hardware. You may also consider researching the different manufactures of RV and Marine energy systems. Choosing equipment from the same family of products often makes a lot of sense and greatly helps to integrate your total system. I, for example, love Victron Energy equipment and used it throughout my RV system build.
Take your time, explore your RV and determine the space your have for equipment, roof space for panels and your approximate energy needs. Once you have a good idea of what you would like, start building your system. It may seem very foreign and intimidating at first, but soon you will be very comfortable (and likely excited) about amp-hours and charger curves and everything related to your RV energy system build. Have fun, be safe and enjoy the ride.
Here are some excellent resources I used while learning about RV energy systems:
Project Goal: To understand the basic components of an RV solar system and general energy requirements for your specific RV system. To start to understand the necessary components for a solar charged battery-based RV energy system including solar panels, batteries, solar charge controller, inverter/charger and monitors and controls with the goal of upgrading your current RV energy system or building one from scratch.
Thanks for the comments. Yes, I am working on detailed documentation of my entire project for my 2020 Airstream 23′ FBT. In the meantime, here is a basic summary of some of the solar connection details for the 23′ Airstream Globetrotter:
– Rooftop solar prewire — Zamp triple roof cap (30 amp max rating) connected by 8 awg stranded wire (yellow and green wire color) Airstream factory installed wiring running from roof cap to the front, right (entry side), cavity under the head of the bed which also contains the 12V DC junction box and WFCO 1000W inverter. The wires are green and yellow and not connected to anything (unless you have an add-on solar package).
– Factory Inverter — WFCO 1,000W pure sine wave inverter located in the same space under the head of the right front twin bed, connects to the front battery box batteries via a 4 awg red and black wire set. The inverter out is via a 14 g Romex-style AC wire that supplies inverted or pass-through (if inverter not on) AC current to the various “Inverter” labeled AC receptacles located throughout the trailer. The Inverter black AC power supply cord is attached to an outlet located near the unit and is supplied by Circuit #4 (15 amp breaker labeled “INVERTER/BED/DIN RECEPTS, INVERTER, BED TV, BLU-RAY”) of the AC breaker panel located under the refrigerator. This inverter has an automatic power transfer switch and allows pass-through AC to all the inverter receptacles if the inverter is off via the connected receptacle.
If you have one of the add-on solar packages, there will be a solar charge controller (Zamp brand I believe) probably located in the same space which would be connected to the factory pre-wire (green and yellow wires coming from the roof cap) and have a mounted controller/monitor in the cabin. I didn’t get the add-on solar package, so I’m not sure about the details of those components, but it only makes sense that it would be located in the same space.
So, if you wanted to add a few solar panels and upgrade your batteries it would be fairly simple. You just mount a few panels on the roof (I will have a detailed article published soon) and plug into the Zamp roof cap. If you choose Zamp solar panels you can plug them in directly as their connections will match those of the Zamp roof cap. If you use solar panels from other manufactures, they typically will have MC4 connectors and you will need a SAE (the Zamp connector style) to MC4 adaptor (easy to get). Make sure you know and check the polarity with a volt meter if using a connection adaptor, as some reverse the polarity. You will need to insure the proper wire polarity when attaching your solar charger connections in the trailer.
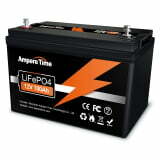
For the batteries, you can replace the 2 automotive-style 12V batteries to the front battery box with upgraded models. I would suggest lithium like the Ampere Time 12V lithium batteries or the Battle Born RV lithium batteries. You can just do a direct replacement – pull out the old ones and drop in the new ones. Make sure your measure your battery box to ensure they will fit before ordering them. The factory-installed charger (converter/charger) should work to charge the lithium batteries, but direct replacement units with specific for lithium charging programs are available to swap out for around or slightly less than $200 (WFCO lithium charger/converter options). These units are mounted behind the WFCO power center located in your RV (under the refrigerator in our unit).
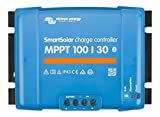
Finally, you would need to add a solar charge controller to manage the power coming from the solar panels. Victron energy makes very high quality equipment and I would recommend using one of their units (it’s what I used) like the Victron Energy SmartSolar MPPT 110/30. Mount the unit near the front cable compartment – like in the adjacent front or side storage compartment at the front of the camper.
To connect the solar charge controller, you will just need to connect the green and yellow solar prewire wires to the panel inputs (labeled PV +/-) and the power out from the solar charger to the batteries (labeled Battery +/-) on the Victron unit. You will have options here, but the easiest is probably just connect the battery output connections to the battery connections from the battery box to the 12V connection box. Make sure you use the proper gauge wire for the size of your solar charger. You will also need to ensure proper fuse protection of the wiring and components and add a disconnect switch for the solar wires from the panels. This is fairly easily done using a DC breaker which can serve as a switch and a fuse – like this Blue Sea thermal circuit breaker. I’ll attach an image of how I mounted the solar charge controller on the entry side of the front storage compartment, pulled the solar prewire cables (yellow and green ones) from the roof through and connected to the solar charge controller via the breaker.
The Battery output connections from the solar charger need to be connected (“spliced” into) to the 12V connections that connect the batteries to the 12V side of the fuse panel (located under the refrigerator). The connections coming from the battery box are red and black 4 awg wires that enter through a hole through the floor of the cable area (front, right corner under the bed) and connect to the buss bars inside the 12V connection box. These buss bars inside the 12V connection box connect to the 12V side of the fuse panel (under the refrigerator) via a white and red 4 awg set of cables (see the photos below).
To connect the solar charger out to the 12V connections, you can simply “add-on” or splice output cables from the solar charger onto the cables leading from the battery box (red and black) to the 12V connection box in the front right cable area of the trailer. This can be fairly easily done using small buss bars or fuse plates like this one Blue Sea fuse block and a mini buss bar to connect the ground connections. To make these connections, you will need to cut the cables (make sure they are disconnected from the batteries) and add ring crimp connections that can attach to the threaded posts of the fuse plate or mini bar bar. For bigger systems and for future add-ons, you would probably just create buss bars for the positive and negative connections, sized for the system. There a variety of small and simple to more complicated buss bar systems. Just search for “Blue Sea buss bar 12v”
and search for RV solar buss bar and fuse connections for some ideas. As your system grows, you will want a shut off switch for the batteries and appropriate fuses too. Here is a commonly used high-amperage switch by Blue Sea.
I hope this helps. I’ll have additional articles detailing all of this soon. Let me know if you have any questions. Congrats on the project, you will absolutely love solar and better batteries – they make a huge difference!
GZup@Y!
Excellent write up. Did you by chance document how you used the zamp solar pre wiring on the roof with your panels and where the cables terminated in your airstream? I’m looking to do something similar and found your article helpful.


Hi Antoine,
Thanks for the comments. Yes, I am working on detailed documentation of my entire project for my 2020 Airstream 23′ FBT. In the meantime, here is a basic summary of some of the solar connection details for the 23′ Airstream Globetrotter:
– Rooftop solar prewire — Zamp triple roof cap (30 amp max rating) connected by 8 awg stranded wire (yellow and green wire color) Airstream factory installed wiring running from roof cap to the front, right (entry side), cavity under the head of the bed which also contains the 12V DC junction box and WFCO 1000W inverter. The wires are green and yellow and not connected to anything (unless you have an add-on solar package).
– Factory Inverter — WFCO 1,000W pure sine wave inverter located in the same space under the head of the right front twin bed, connects to the front battery box batteries via a 4 awg red and black wire set. The inverter out is via a 14 g Romex-style AC wire that supplies inverted or pass-through (if inverter not on) AC current to the various “Inverter” labeled AC receptacles located throughout the trailer. The Inverter black AC power supply cord is attached to an outlet located near the unit and is supplied by Circuit #4 (15 amp breaker labeled “INVERTER/BED/DIN RECEPTS, INVERTER, BED TV, BLU-RAY”) of the AC breaker panel located under the refrigerator. This inverter has an automatic power transfer switch and allows pass-through AC to all the inverter receptacles if the inverter is off via the connected receptacle.
If you have one of the add-on solar packages, there will be a solar charge controller (Zamp brand I believe) probably located in the same space which would be connected to the factory pre-wire (green and yellow wires coming from the roof cap) and have a mounted controller/monitor in the cabin. I didn’t get the add-on solar package, so I’m not sure about the details of those components, but it only makes sense that it would be located in the same space.
So, if you wanted to add a few solar panels and upgrade your batteries it would be fairly simple. You just mount a few panels on the roof (I will have a detailed article published soon) and plug into the Zamp roof cap. If you choose Zamp solar panels you can plug them in directly as their connections will match those of the Zamp roof cap. If you use solar panels from other manufactures, they typically will have MC4 connectors and you will need a SAE (the Zamp connector style) to MC4 adaptor (easy to get). Make sure you know and check the polarity with a volt meter if using a connection adaptor, as some reverse the polarity. You will need to insure the proper wire polarity when attaching your solar charger connections in the trailer.
For the batteries, you can replace the 2 automotive-style 12V batteries to the front battery box with upgraded models. I would suggest lithium like the Ampere Time 12V lithium batteries or the Battle Born RV lithium batteries. You can just do a direct replacement – pull out the old ones and drop in the new ones. Make sure your measure your battery box to ensure they will fit before ordering them. The factory-installed charger (converter/charger) should work to charge the lithium batteries, but direct replacement units with specific for lithium charging programs are available to swap out for around or slightly less than $200 (WFCO lithium charger/converter options). These units are mounted behind the WFCO power center located in your RV (under the refrigerator in our unit).
Finally, you would need to add a solar charge controller to manage the power coming from the solar panels. Victron energy makes very high quality equipment and I would recommend using one of their units (it’s what I used) like the Victron Energy SmartSolar MPPT 110/30. Mount the unit near the front cable compartment – like in the adjacent front or side storage compartment at the front of the camper.
To connect the solar charge controller, you will just need to connect the green and yellow solar prewire wires to the panel inputs (labeled PV +/-) and the power out from the solar charger to the batteries (labeled Battery +/-) on the Victron unit. You will have options here, but the easiest is probably just connect the battery output connections to the battery connections from the battery box to the 12V connection box. Make sure you use the proper gauge wire for the size of your solar charger. You will also need to ensure proper fuse protection of the wiring and components and add a disconnect switch for the solar wires from the panels. This is fairly easily done using a DC breaker which can serve as a switch and a fuse – like this Blue Sea thermal circuit breaker. I’ll attach an image of how I mounted the solar charge controller on the entry side of the front storage compartment, pulled the solar prewire cables (yellow and green ones) from the roof through and connected to the solar charge controller via the breaker.
The Battery output connections from the solar charger need to be connected (“spliced” into) to the 12V connections that connect the batteries to the 12V side of the fuse panel (located under the refrigerator). The connections coming from the battery box are red and black 4 awg wires that enter through a hole through the floor of the cable area (front, right corner under the bed) and connect to the buss bars inside the 12V connection box. These buss bars inside the 12V connection box connect to the 12V side of the fuse panel (under the refrigerator) via a white and red 4 awg set of cables (see the photos below).
To connect the solar charger out to the 12V connections, you can simply “add-on” or splice output cables from the solar charger onto the cables leading from the battery box (red and black) to the 12V connection box in the front right cable area of the trailer. This can be fairly easily done using small buss bars or fuse plates like this one Blue Sea fuse block and a mini buss bar to connect the ground connections. To make these connections, you will need to cut the cables (make sure they are disconnected from the batteries) and add ring crimp connections that can attach to the threaded posts of the fuse plate or mini bar bar. For bigger systems and for future add-ons, you would probably just create buss bars for the positive and negative connections, sized for the system. There a variety of small and simple to more complicated buss bar systems. Just search for “Blue Sea buss bar 12v”
and search for RV solar buss bar and fuse connections for some ideas. As your system grows, you will want a shut off switch for the batteries and appropriate fuses too. Here is a commonly used high-amperage switch by Blue Sea.
I hope this helps. I’ll have additional articles detailing all of this soon. Let me know if you have any questions. Congrats on the project, you will absolutely love solar and better batteries – they make a huge difference!
GZup@Y!
Excellent write up. Did you by chance document how you used the zamp solar pre wiring on the roof with your panels and where the cables terminated in your airstream? I’m looking to do something similar and found your article helpful.
Thanks